There's nothing better than a great excuse to get some art done! With the anticipation of our 2nd child, William Bradley Patenaude, I set course to fill his walls with my imagination like I did for our daughter Lily.
 |
| One of the creatures that inhabit Lily's room |
After a little debate on the theme for our new son's new room decor, Jen & I finally decided on a spacey direction filled with little green men. Because I'm a big fan of the creative freedom and potential for education that a space provides, in addition to wanting to put some existing alien designs to use... space won out!)
So!... After scavenging through a couple of sketch pads from the past few years and reworking the pieces to fit better in to the theme + a couple of new ones from scratch, here are the designs that made the cut...
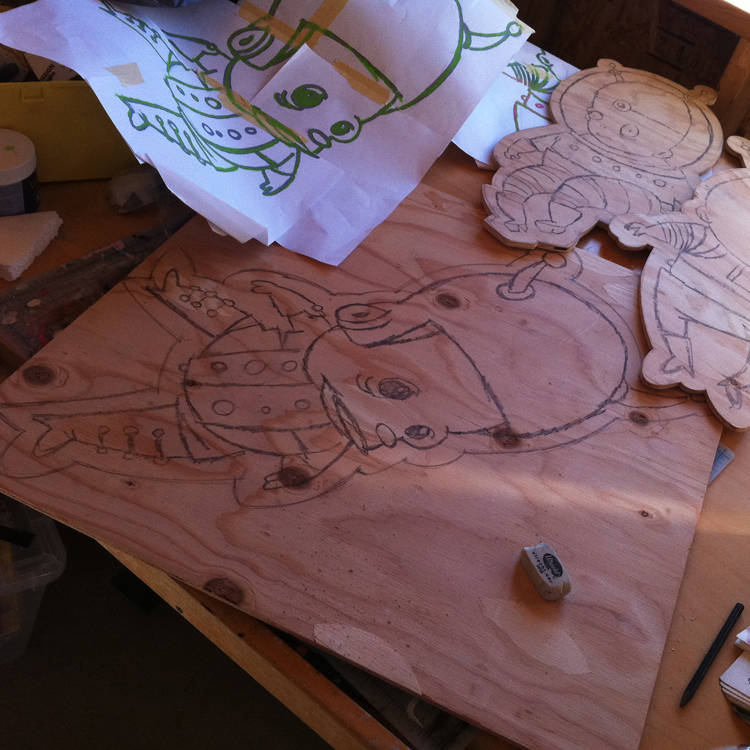
Next up comes printing the designs to trace down on to the wood. Because I like to keep the designs nice and simple with their initial spontaneity intact, they're scanned, magnified, and printed straight off of the original sketch.
The final sizes that they're printed at are essentially sized just to feel "right", in addition to taking into consideration how the characters look in relation to their neighbors. I do this through a very painful process [made even more painful, if the sizes turn out wrong] starting with printing out small sections of the final image with the cheap printer on 8.5"X11" paper- I make sure that each section of the piece "bleeds" onto the next section, so that I can tape them all together on a large window in my house. After they're all put together , I then trace them on to sheets of plywood with graphite paper.

Next up was the color picking, which was a bit random in the selection and type of paint. Most of the paint consisted of acrylic valspar samples [that didn't make the cut for the main wall colors] we'd bought for the kids' rooms' walls (which were coincidentally colors that we already like;)). + I added yellow & green liquid acrylics left over from previous projects (I LOVE their flat finish], tons of gesso, and a bit of spray primer.
I then cleaned up the lines, in addition to laying in how thick the white "halo" surrounding the characters will be.
Next up to bat, is the scroll saw- I always love firing this sucker up- It brings a few things to the project that I sometimes miss from the art I do @ work: "manliness", "realness", chaos, a pinch of danger, and of course NOISE!
After the edges are sanded and smooth, a couple layers of gesso [just because it's cheaper than acrylic... and white is white;)] go on the halo. For smaller shapes [like the stars], I use spray primer [SOOOooo much easier and even], but because there's a danger of it covering the lines, the more important pieces' halos are all hand painted [BORING!]. Knowing that it's the color that really finishes the pieces [essentially "bringing them to life"], I really like what they look like after this step because of all the potential they have.
... And here comes the color!...
One of the final, and most important steps is applying the outlines. For this I use a brush to lay on Indian ink, sometimes mixing in a bit of black acrylic- ALMOST DONE!
The finishing touches include ~5 coats of sealant before having their mounting pieces [which I prepare before hand using scrap pieces of wood cut into varying-sized squares] attached with wood glue. The mounting process is something that I'm particularly happy with because A] It makes use of scraps that would otherwise be tossed ["green" point;)?], and B] because I prepare the mounting pieces with varying depths of thickness giving the relative flatness of the compositions a little punch of that 3rd dimension.
In an attempt to bring the pieces together, I decided to "sprinkle" stars around the room in the same fashion I used flowers in Lily's room.
 |
| One of the many characters that hang out on walls in Lily's room |
And finally, here my friends, are the finished pieces mounted in the room [which I'm hoping will come to life even more, once his room is all decked out with more space-themed decor]...
All for this little bugaroo, William "Willy" Bradley Patenaude...
I hope you like it, little buddy! ... And I hope the rest of you like it too!
... Patenaude